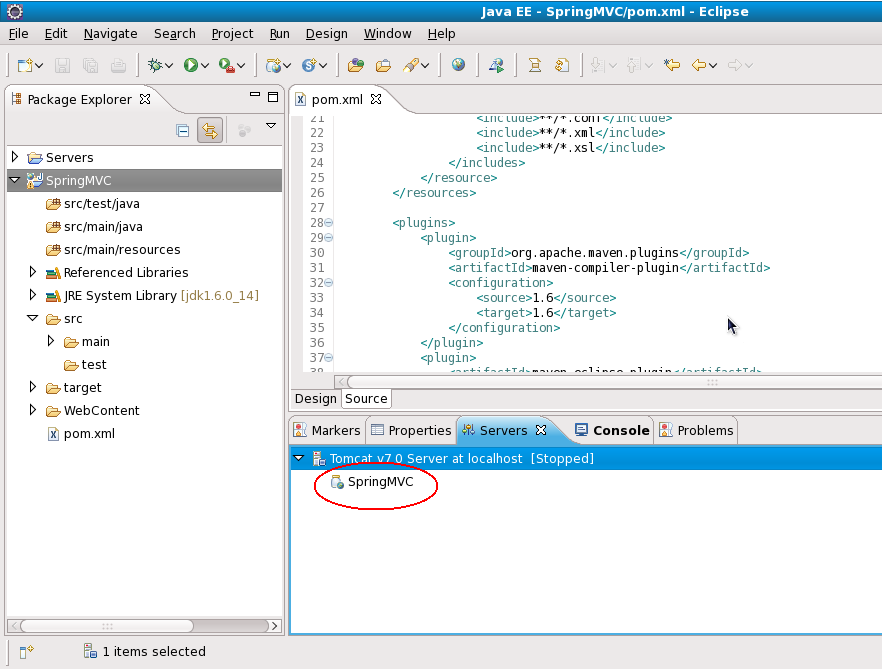
Eclipse WTP has this nice feature where it allows you to deploy, run and debug Web Applications from the IDE. You start by going to the Server View, adding the target server (like Apache Tomcat in our case) and then adding the Web Project to the server. This is how the view looks like:

But I have often faced this problem: when I run mvn eclipse:eclipse on a Maven Web Project to convert it to an Eclipse project, it is not recognised as a Web Project by Eclipse. When I right-click on the server and select Add Remove Projects, it does not appear in the option box. But to me mvn eclipse:eclipse -DdownloadSources=true -DdownloadJavadocs=true is indispensable as it downloads and links all the sources and JavaDocs, which comes very handy. On the other hand if I cannot add my project as a Web Project in Eclipse, running and debugging becomes a big issue. So how do I reconcile these two?
Solution 1: Specify the WTP Version
While running mvn eclipse:eclipse, specify the WTP Version by passing the -Dwtpversion=2.0 argument. The command looks like:
mvn eclipse:clean eclipse:eclipse -DdownloadSources=true -DdownloadJavadocs=true -Dwtpversion=2.0
Note that as of this writing, the supported versions of WTP are 1.0, 1.5, 2.0 and R7.
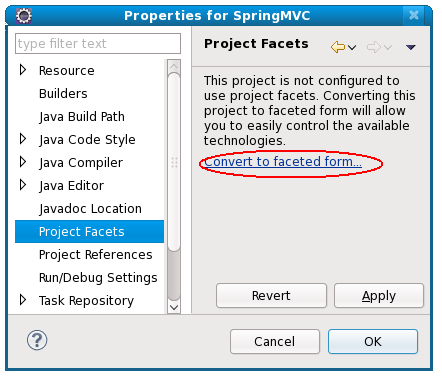
Solution 2: Convert it to a Facted Project
Right click on the project, go to Properties, then select Project Facets.

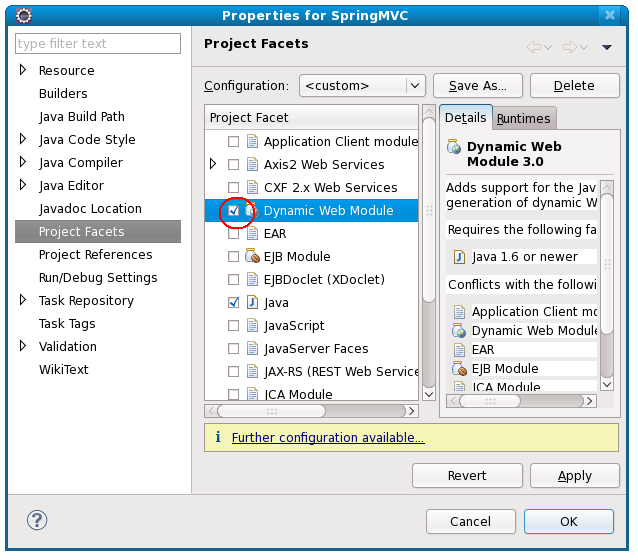
Another dialog appears having the available facets.

Select Dynamic Web Module.
Solution 3: Manual editing
I like this best as it gives lot of flexibility around configuration. First you need to modify the .project file as shown:
	MyWebProject


			org.eclipse.wst.jsdt.core.javascriptValidator


			org.eclipse.jdt.core.javabuilder


			org.eclipse.wst.common.project.facet.core.builder


			org.eclipse.wst.validation.validationbuilder


		org.eclipse.jem.workbench.JavaEMFNature
		org.eclipse.wst.common.modulecore.ModuleCoreNature
		org.eclipse.wst.common.project.facet.core.nature
		org.eclipse.jdt.core.javanature
		org.eclipse.wst.jsdt.core.jsNature
Then, inside the .settings directory, you need to create two files called org.eclipse.wst.common.component and org.eclipse.wst.common.project.facet.core.xml.
org.eclipse.wst.common.component
org.eclipse.wst.common.project.facet.core.xml